Deploying to App Store Connect
· 20min · software
I have recently developed an application that I wanted to release to a pool of internal users using App Store Connect. Unfortunately, the process is not evident, and I had to look up some resources on the configurations and mechanics to get an understanding of what is possible.
TestFlight Overview
Apple Testflight lets you upload a beta build of your application to App Store Connect instead of the normal App Store. Beta testers can then use the TestFlight application to install the beta app.
- Only up to 100 apps can be tested at the same time.
- TestFlight builds remain active for only 90 days after upload.
- Can designate up to 100 members for internal testing
- Each internal team member can test up to 30 devices and access all beta builds
- Can invite up to 10,000 external testers using email addresses or by sharing a public link
- Before testing can begin, the first build of your app must be approved by TestFlight App Review. Keep this in mind when developing applications, though online it seems to take about 1-3 days.
- Note that there is no app review process for internal testing.
- Testers can provide feedback directly from the application by simply taking a screenshot.
1. Creating an Application
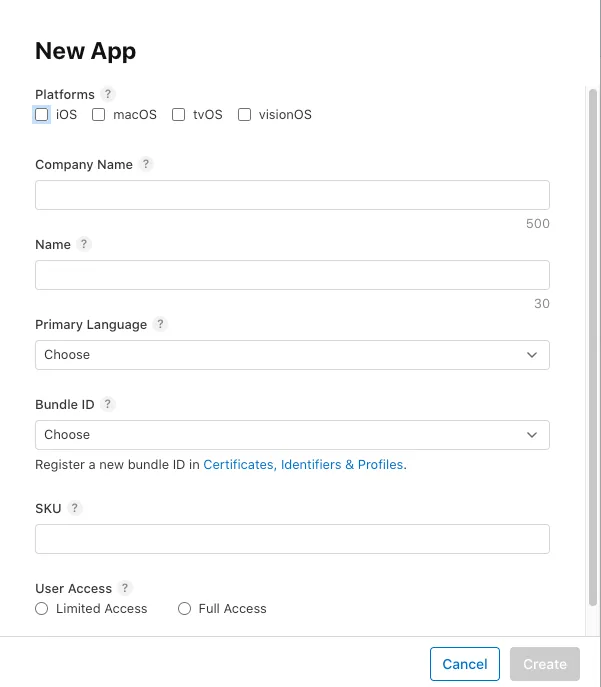
First, we need to create an application in App Store Connect for the app that we want to distribute. A screenshot of the screen is provided below, and the information is self-evident. Note that the SKU stands for Stock Keeping Unit, and can be anything you want for keeping the internal ID of the application.
2. Enter Test Information
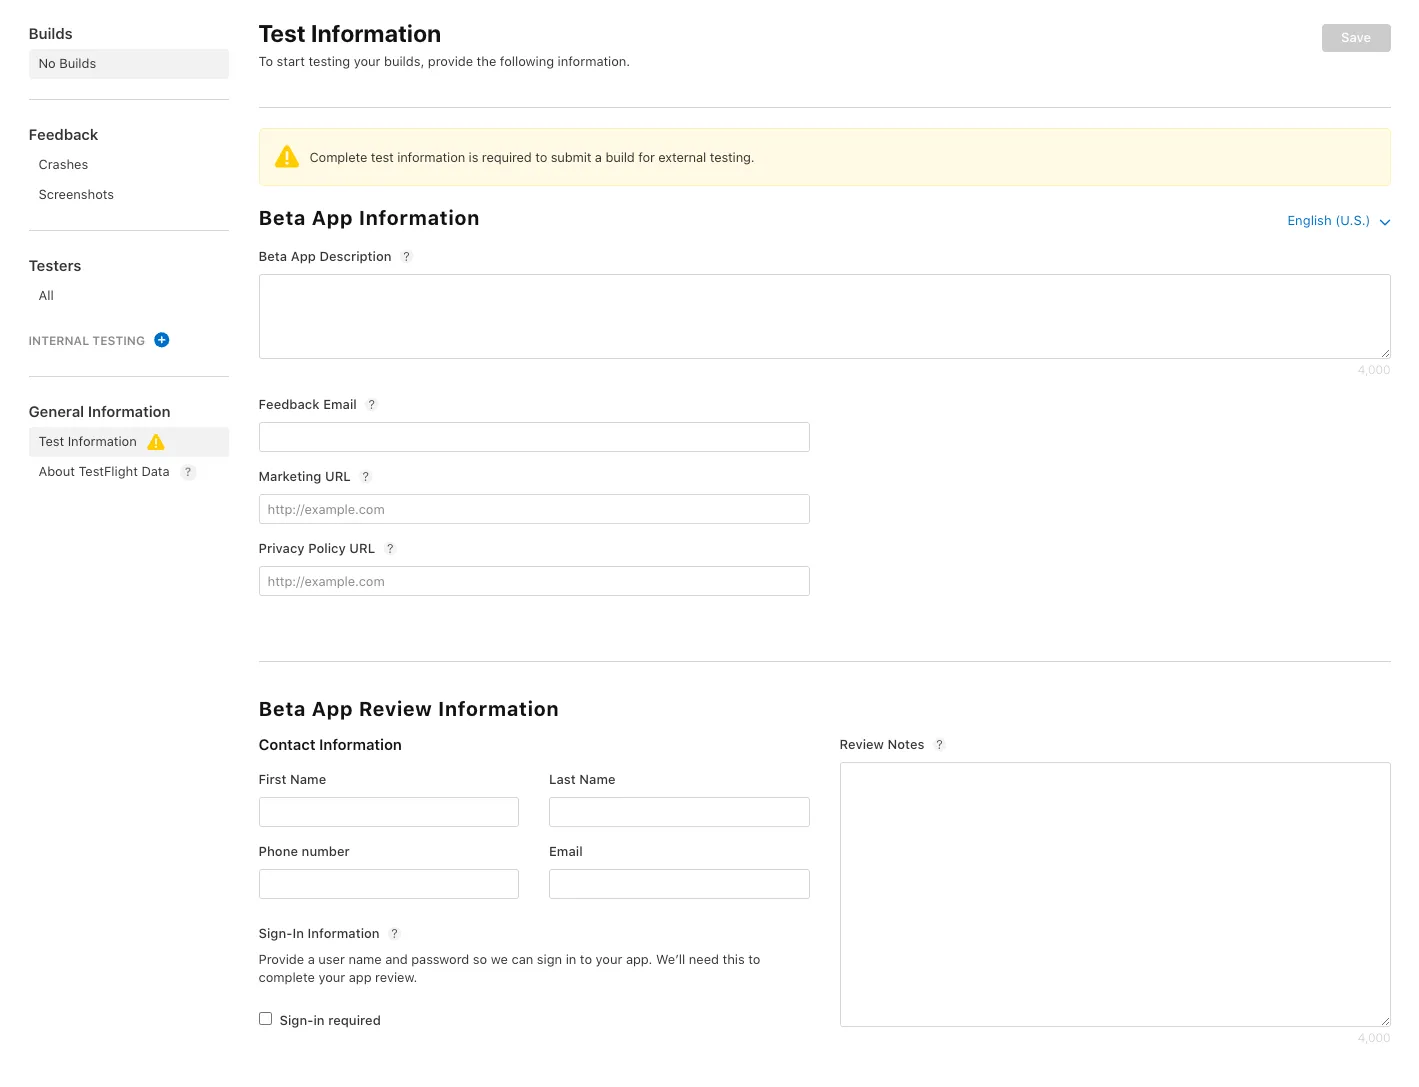
To distribute the application to external testers, you have to enter some TestFlight information. Apple states that all of this information is required, although there are people who seem to have gotten approved while leaving a few things out. The most important parts that you may not have access to are the Privacy Policy and the license agreement. There are some free generators out there that you can use to generate these documents, like this one here.
3. Upload the Build
We can then upload the build using XCode.
- The first time you upload a build, the bundle ID and version number (located in App bundle) are used to associate the build with the app and version record in App Store Connect.
- You can create and upload the build with XCode Cloud, which lets you adopt CI/CD. We will look further implementing an XCode Cloud deployment pipeline in this note.
Uploading App Binary with XCode
- Create an archive of the application. This is a build of your application, including debugging information, that XCode stores in a bundle. XCode will then repackage the archive contents based on the distribution configuration that is chosen in a later step. Archiving can be done by selecting
Product > Archivein the XCode window. - Make sure that the
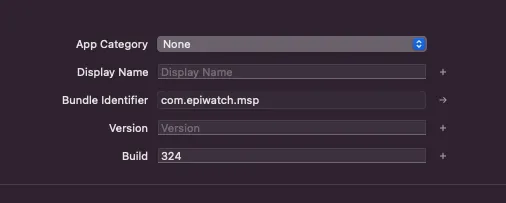
App Category,Display Name,Bundle Identifier,Version, andBuildof your application is correct. You can find this information in your project settings. The Version number is used to indicate the release number of your application. It generally follows themajor.minor.patchformat. The build number is the sequential number that you increment each time you upload a build of the same version. This is important because you can release multiple builds of the same version. In App Store Connect, this could be due to 3 month expiry.
- Note, as we are building to a wide range of devices, and not specifically the simulator or any one physical device, make sure that the device is set to
Any iOS Device.
![]()
- Once the build is complete, it will appear in the
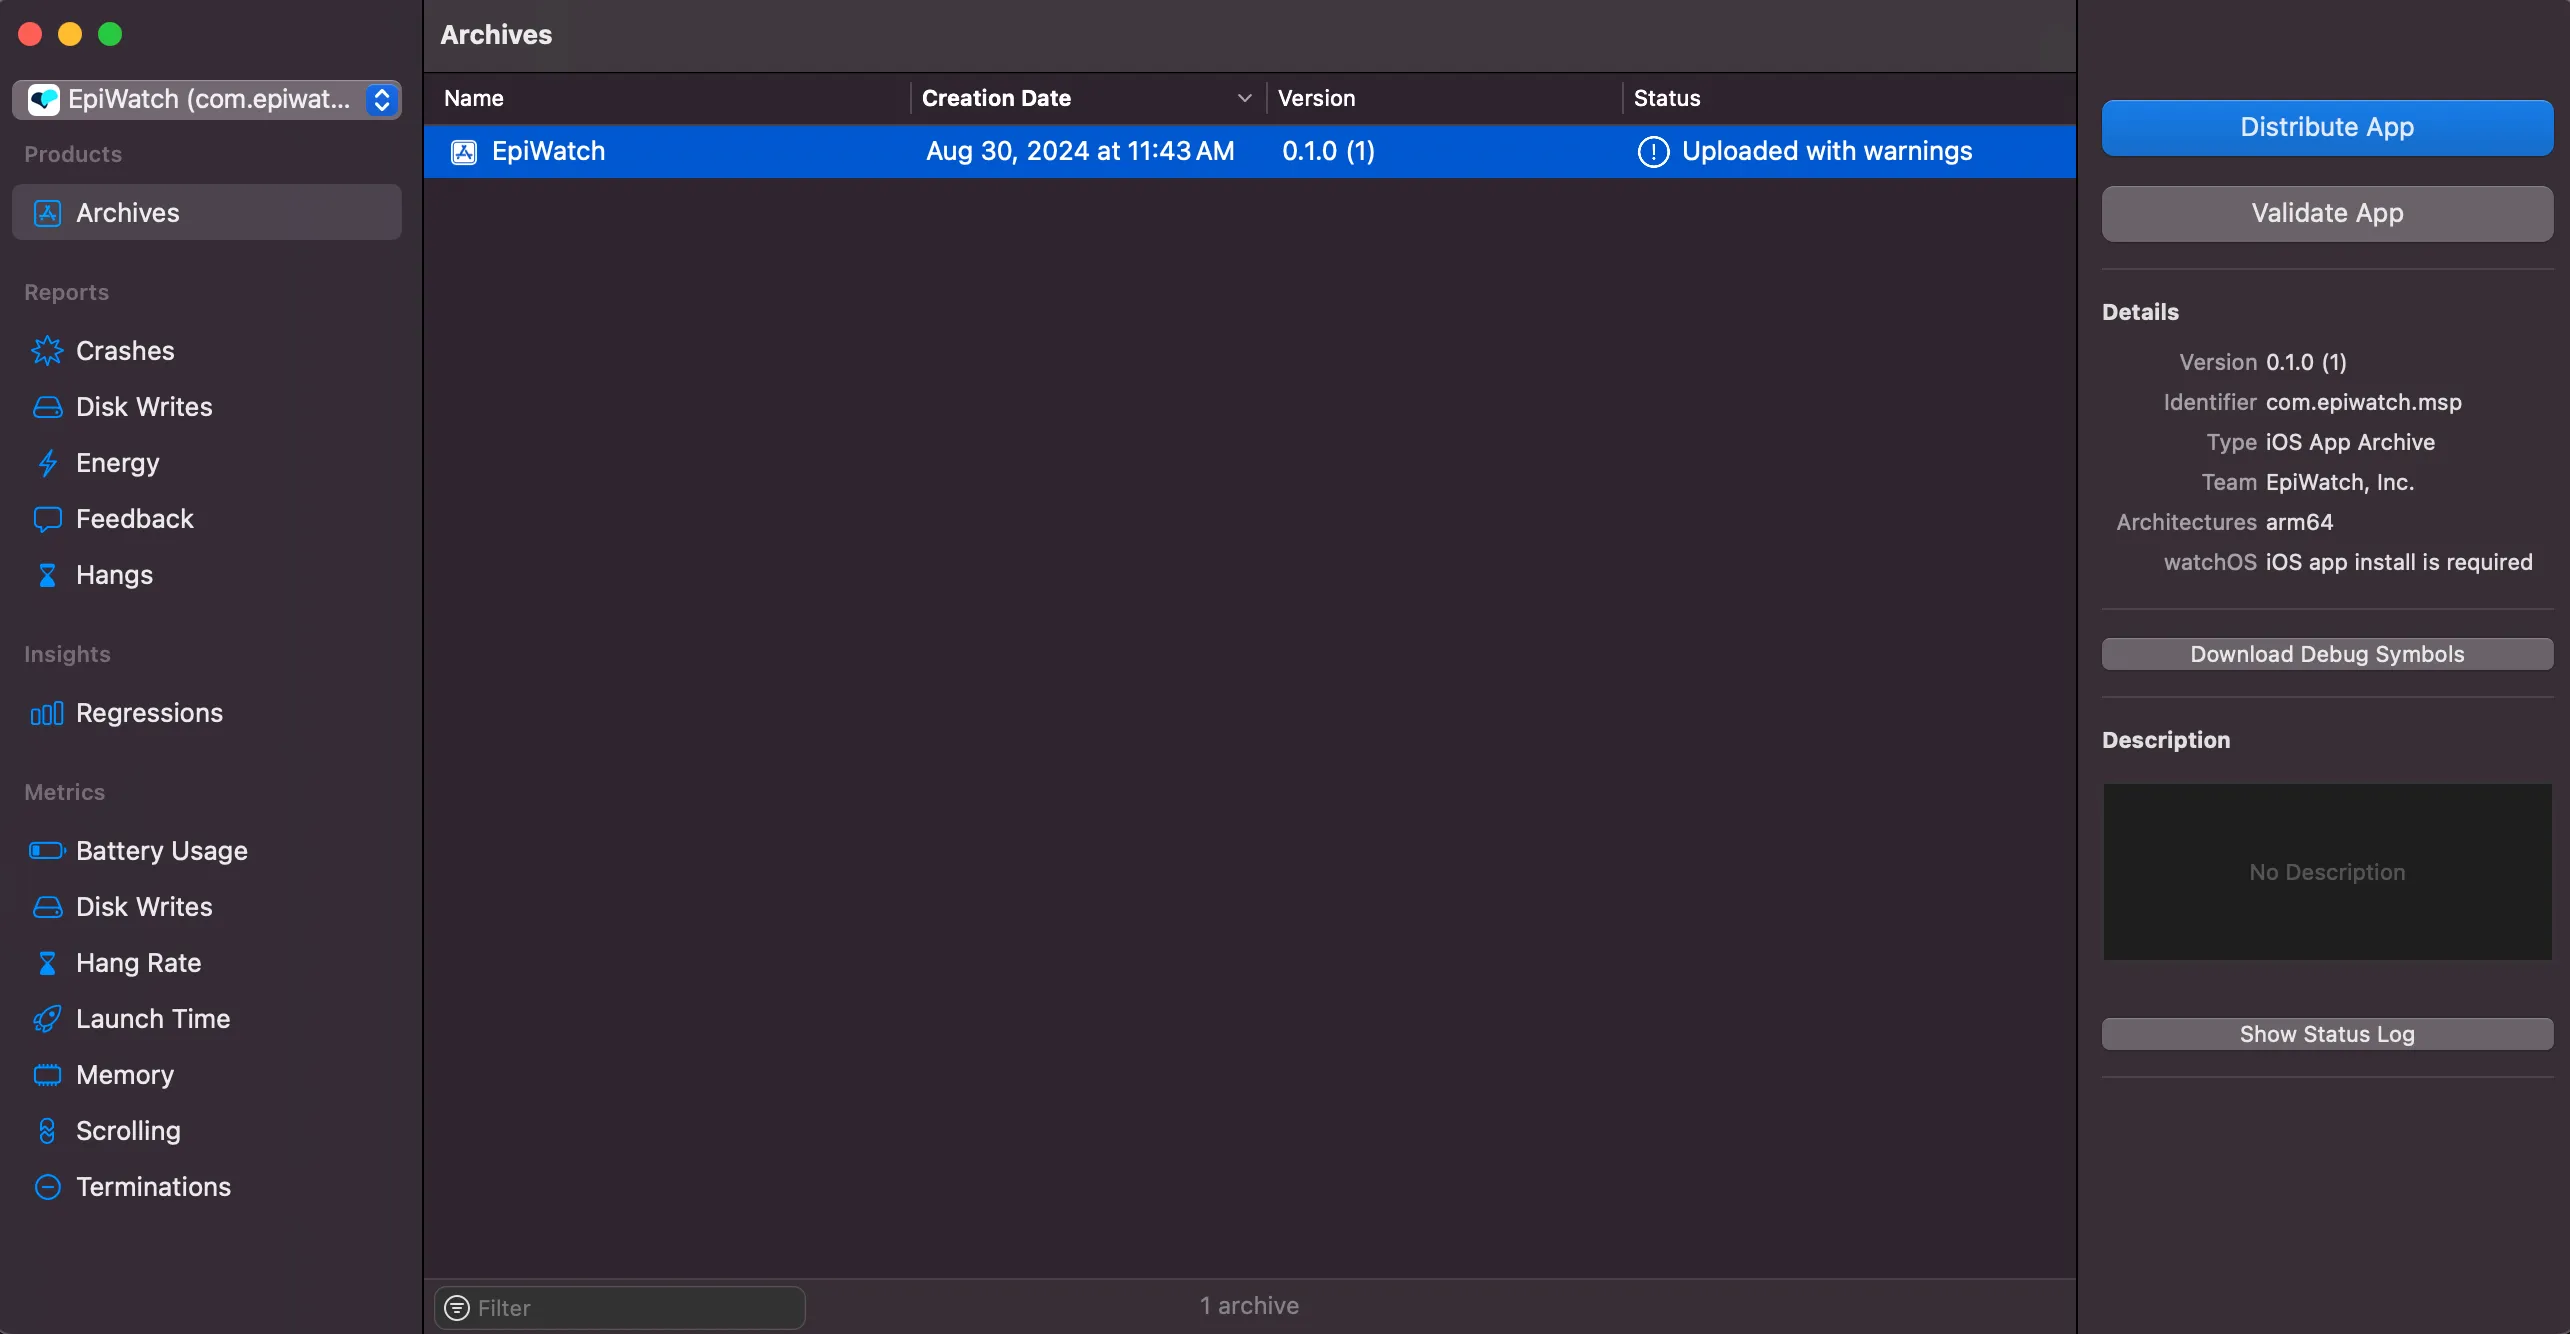
OrganizerunderArchives. You can open theOrganizerviaWindow > Organizer. Now, if you want to confirm that the application is ready to submit to TestFlight or the AppStore without actually submitting, you can click onValidate App. This will cause XCode to perform a limited initial validation of the application and provide feedback.
-
You can now select a distribution method. There is more information on the different distribution methods provided here, but we are going to choose TestFlight Internal Only, as we don’t want to generate a development build that will be submitted to the App Store.
-
We also have the option of creating a custom distribution, which is what I often select as I don’t want the build to be limited to only internal users. There will be more options during this selection, but it will provide more control over the distribution of your application. I will not cover the custom distribution here.
-
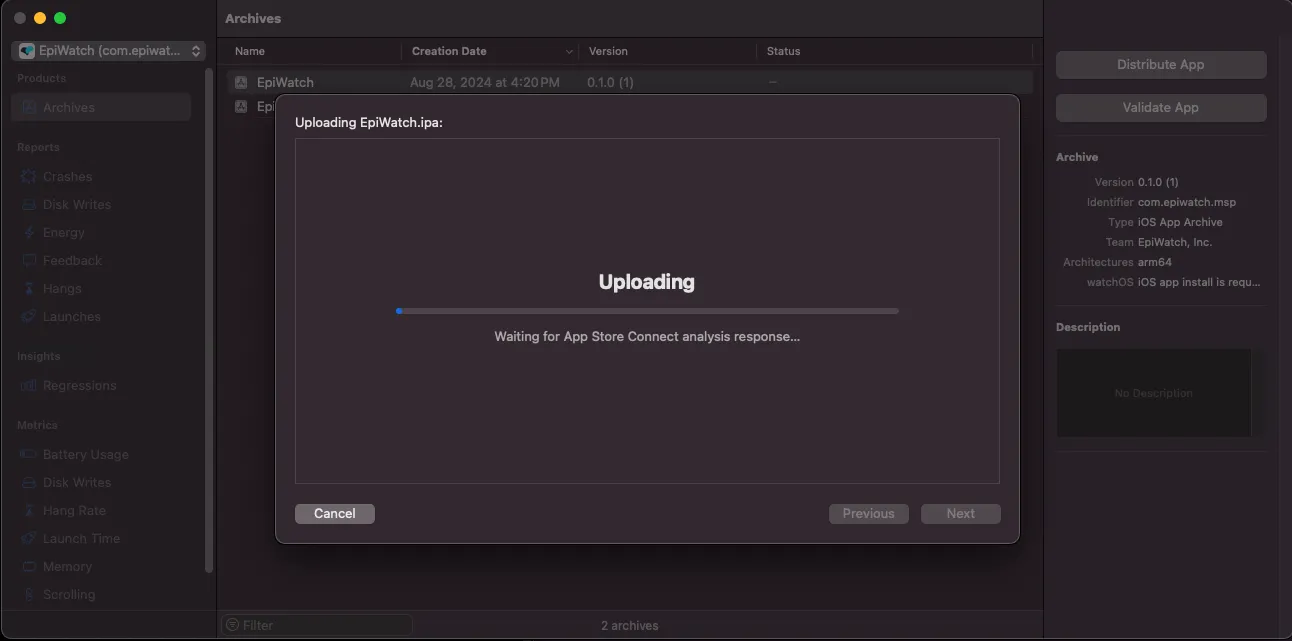
When the configuration is complete, XCode will start uploading your archive to App Store Connect. Any errors in your application will be uncovered here. If you want to see potential errors before the distribution step, you can validate the application first after step 4.
4. Configuring and Releasing on TestFlight
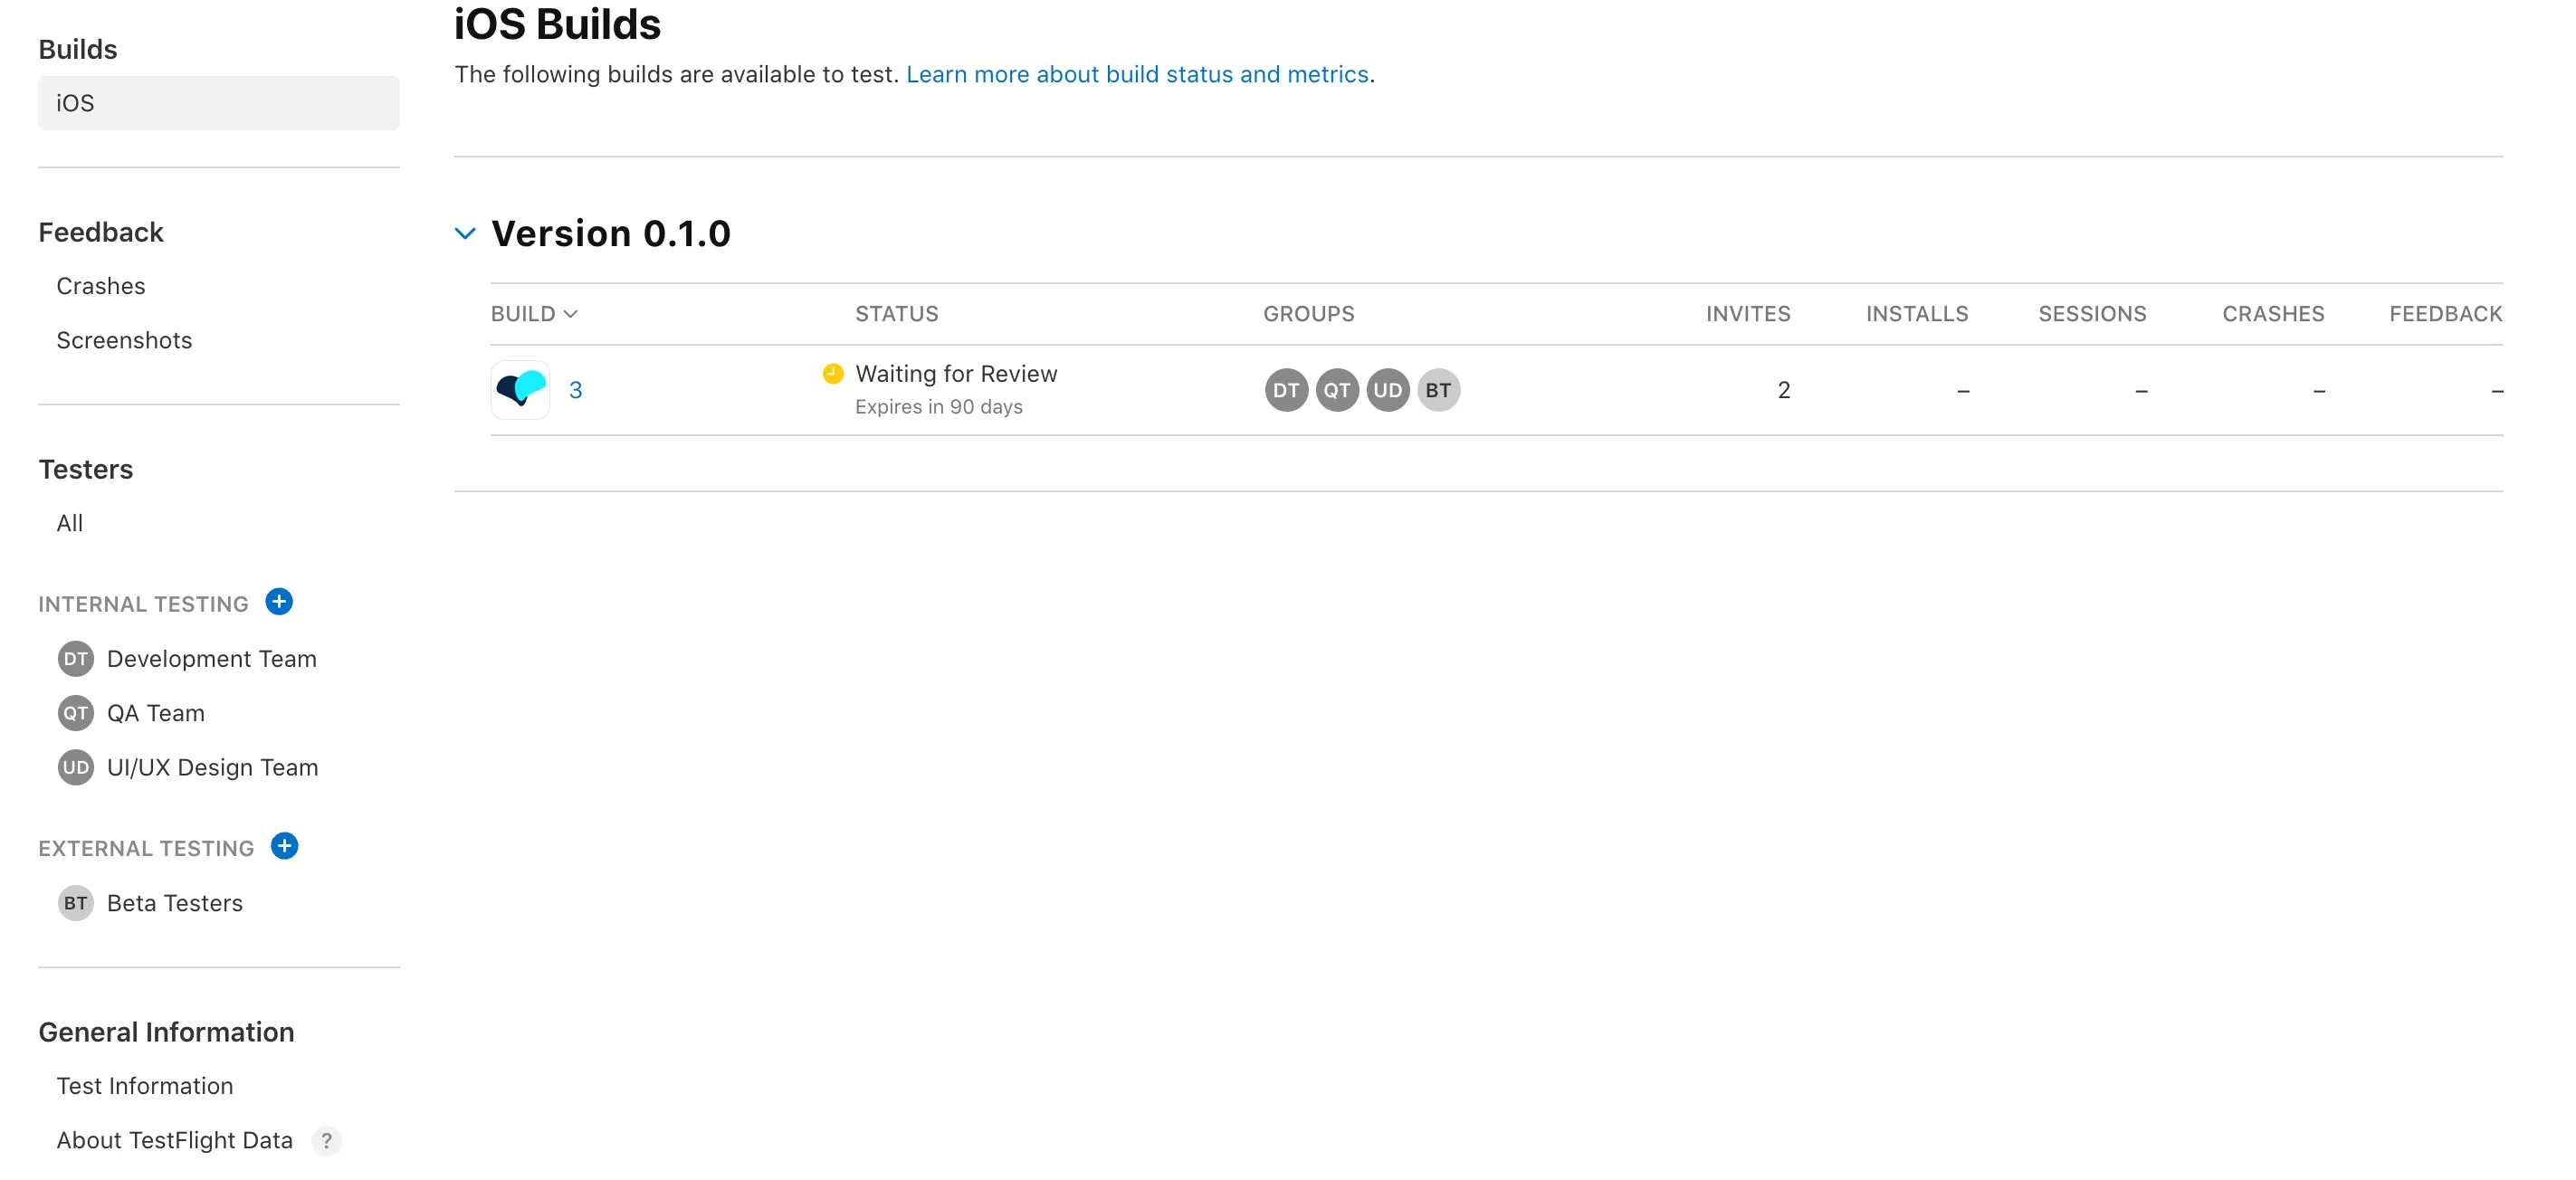
After the application is uploaded to App Store Connect, it will show in your TestFlight builds on App Store connect under your app. The app is now ready to be shared with internal and external beta testers.
Release To Internal Testers
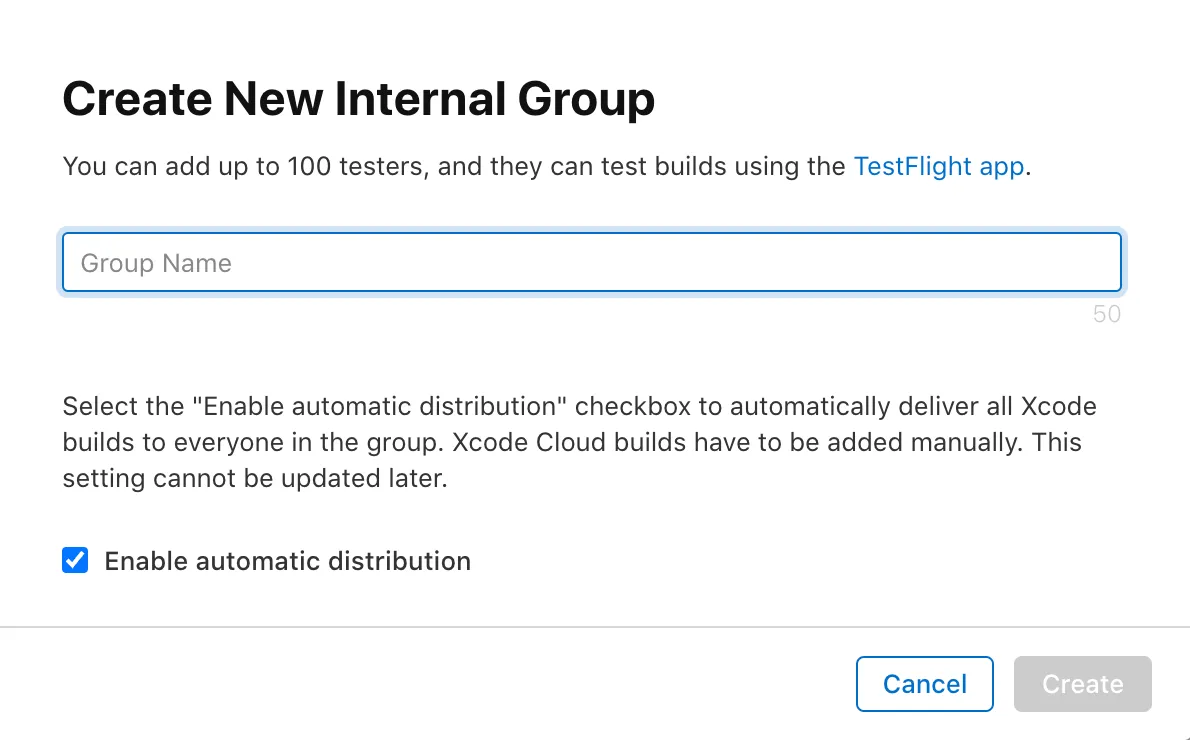
Internal testers will can begin testing immediately, though there is a limit of 100 members that you can add as internal testers. You can configure new internal testers by first adding a testing group, and then adding internal users to that testing group. Note when setting up the group, you can setup automatic distribution such that the application will immediately get distributed upon the upload of a new build.
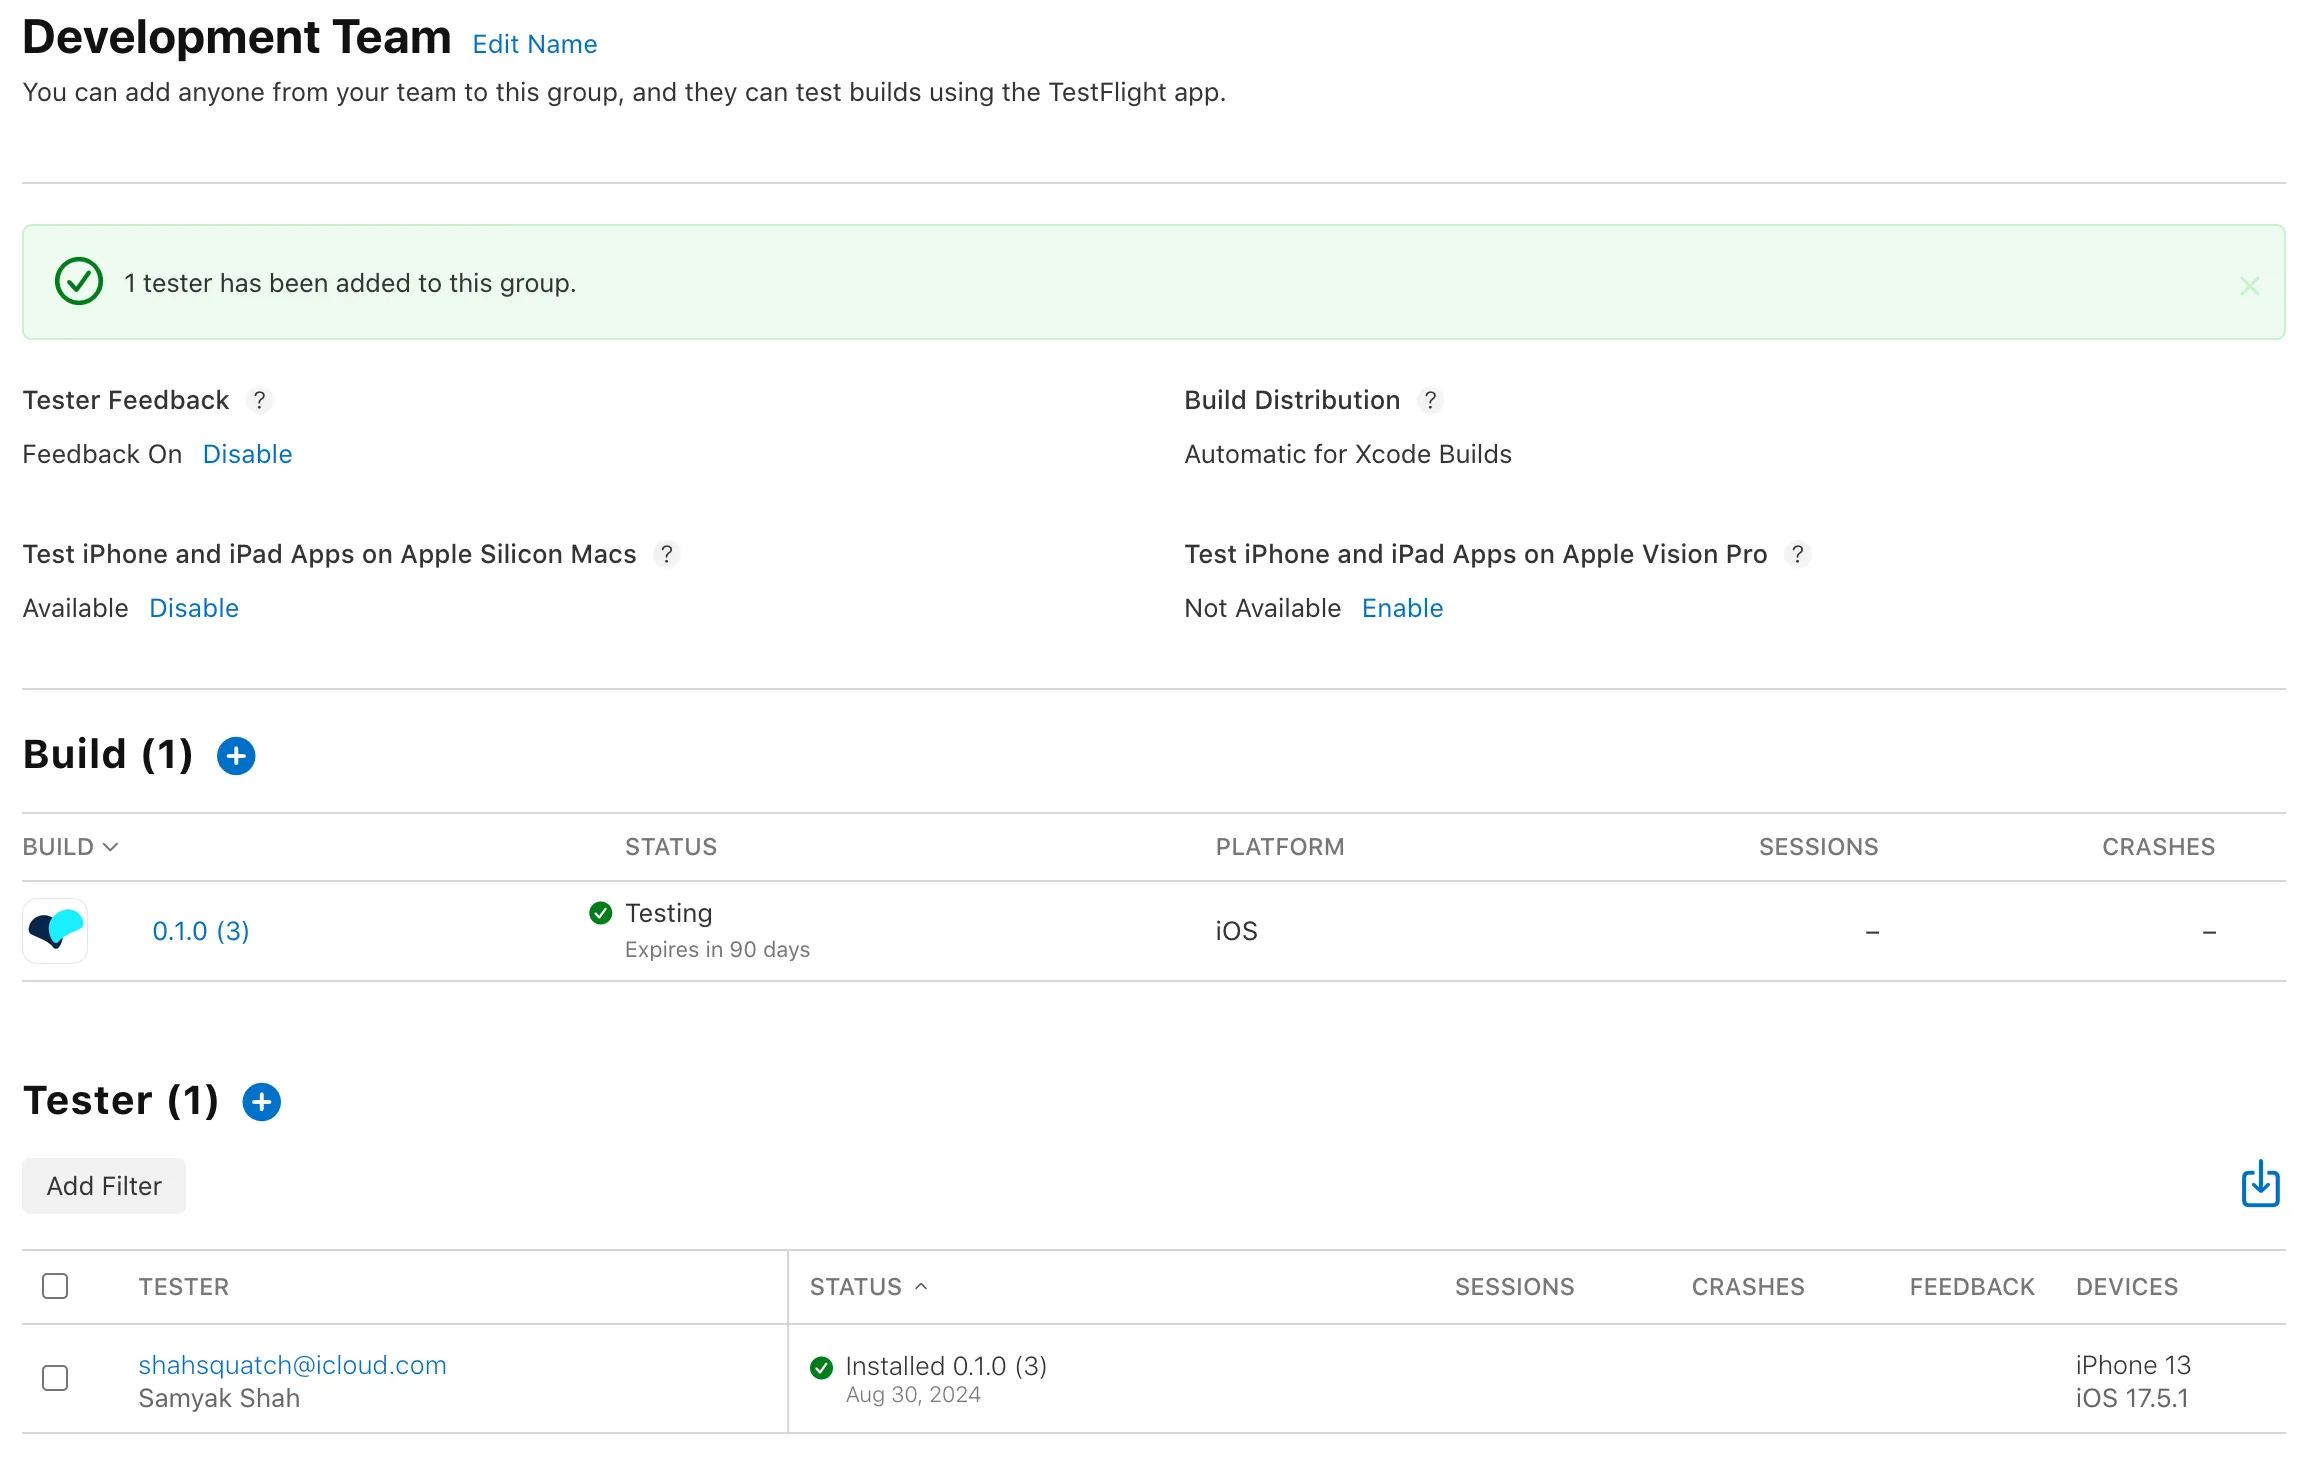
Then, add the build to the internal group, and the users in the group will be notified.
Release to External Testers
Before release to external testers, the build will first have to go through a review process. As previously stated, this review process will take approximately 1-3 days on average. While the application is being reviewed, the status of the build will be Waiting For Review in the External Testing tab. When it gets approved, you will receive an email and will be able to add external testers to test the application.
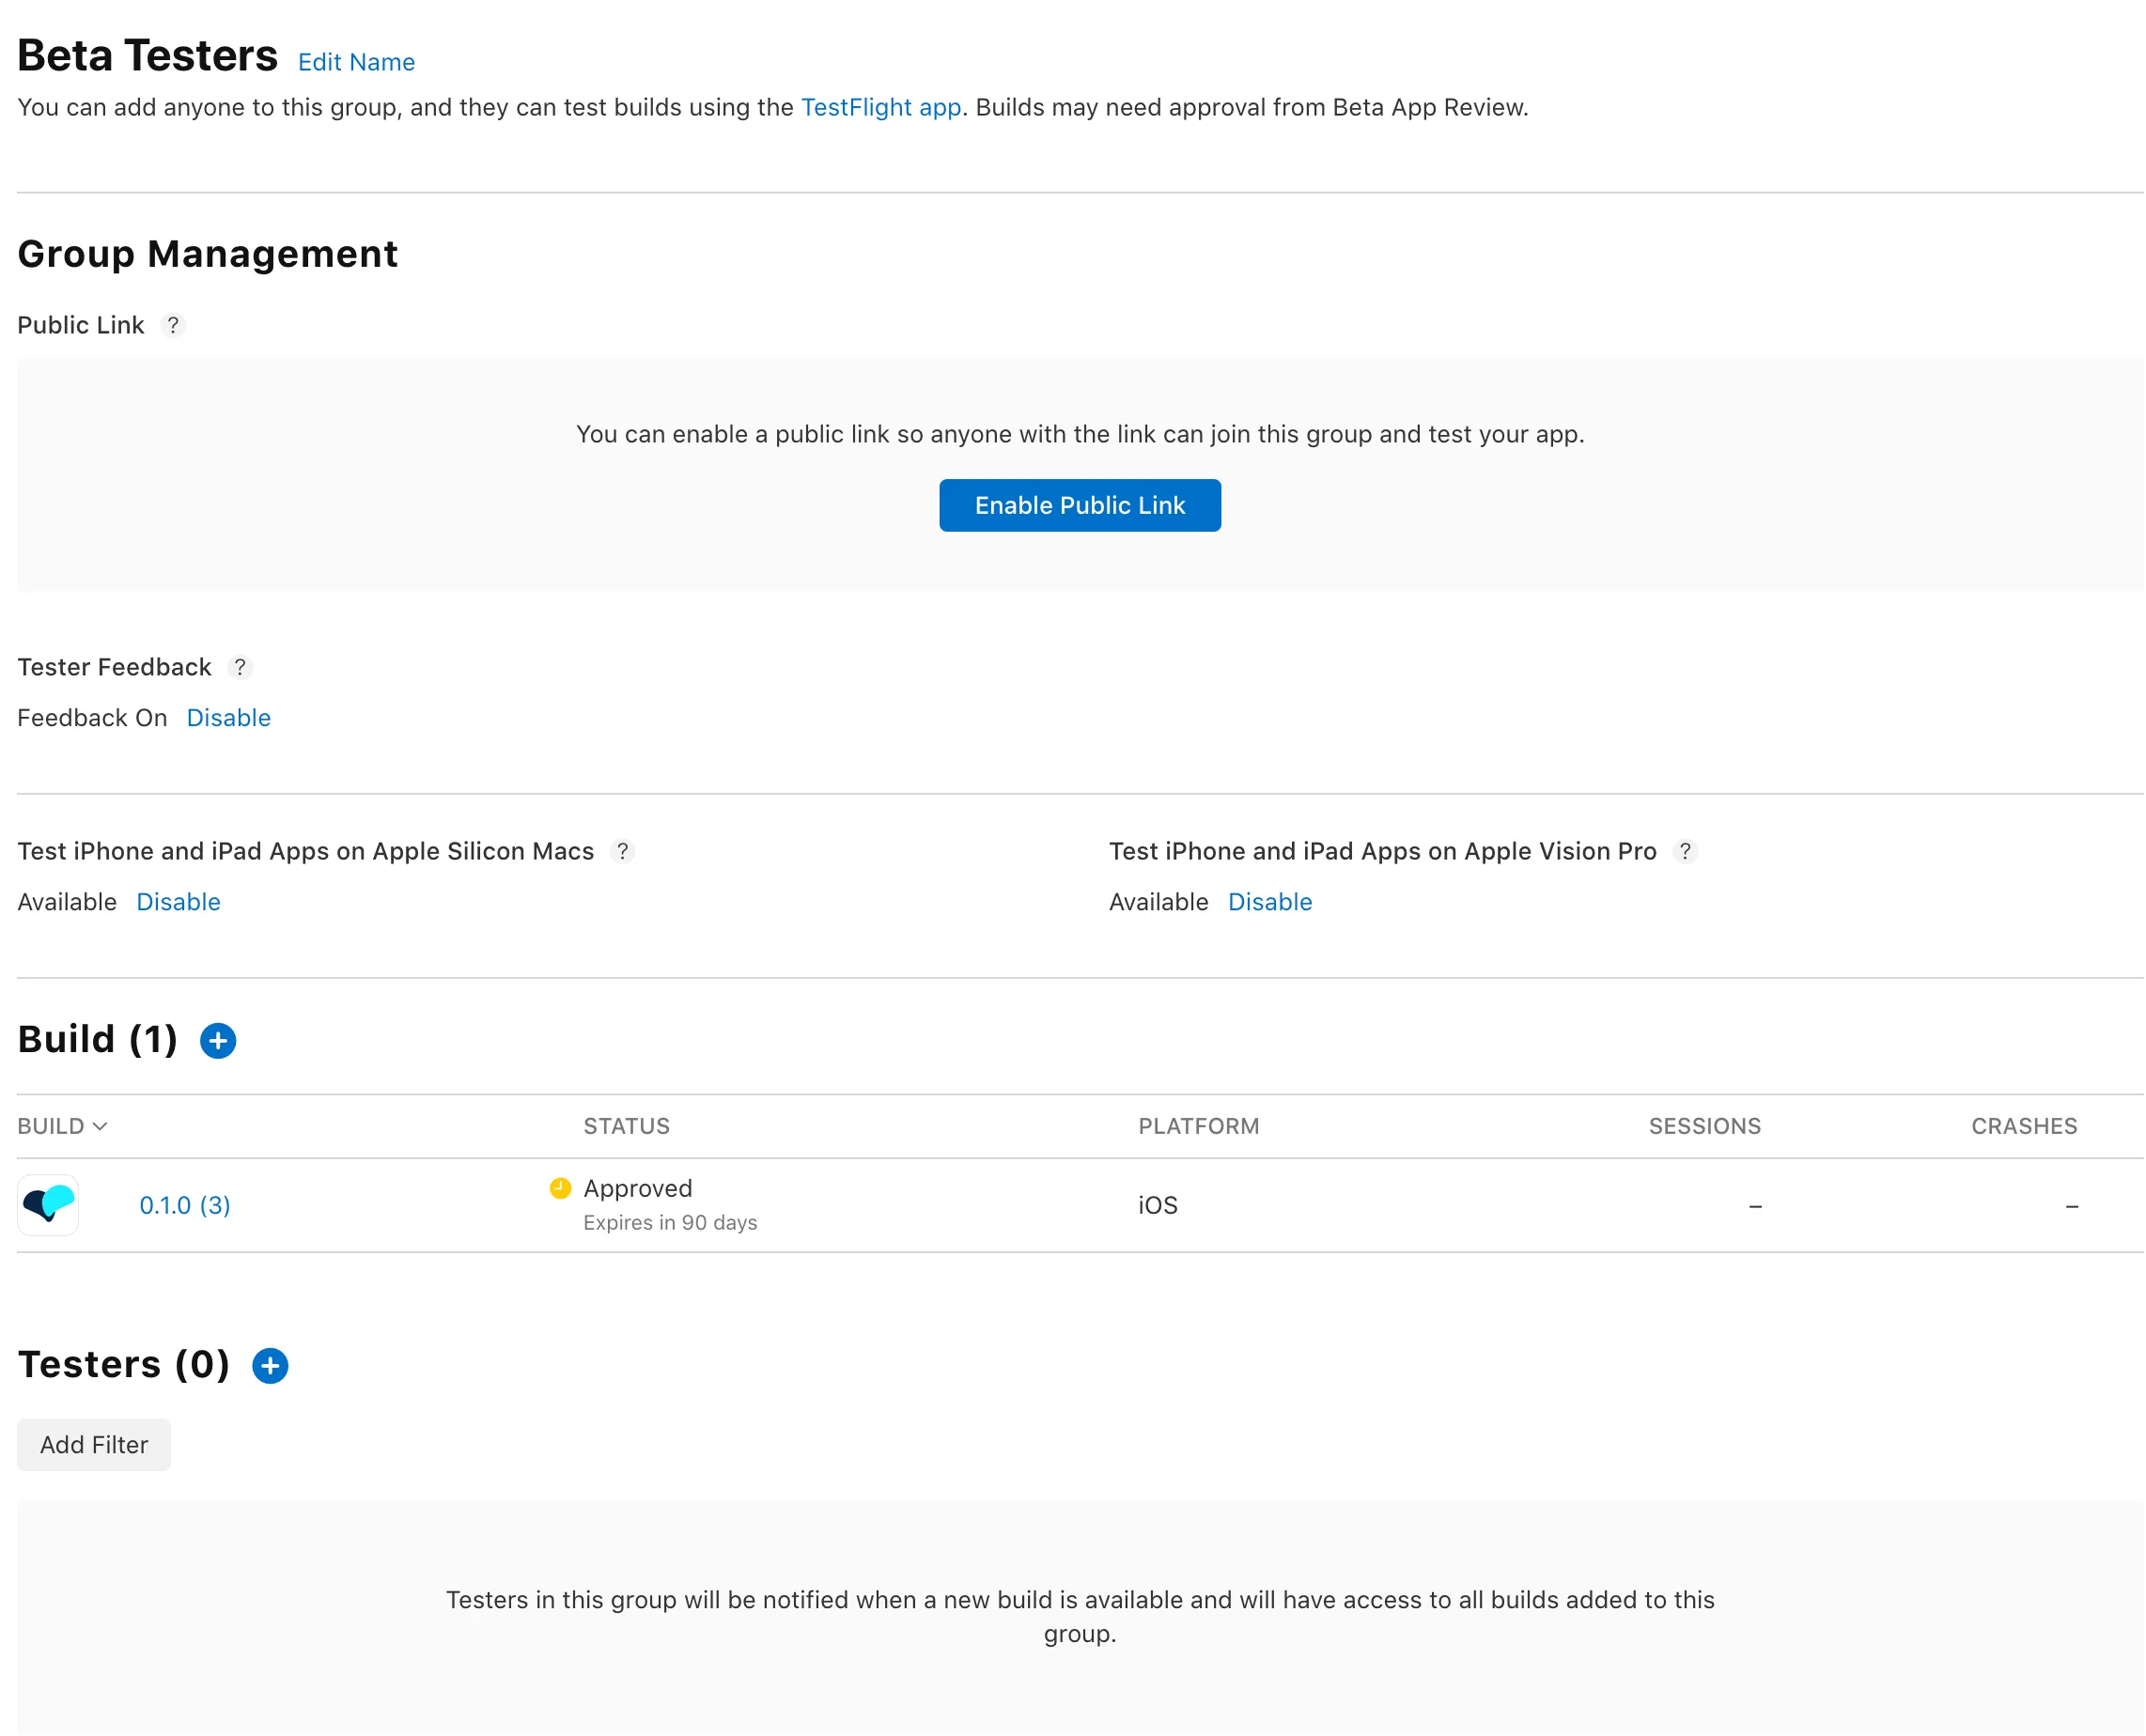
To now you can add a public link that can be shared to anyone who wants to test your application, or you can add them as testers. Note that you will first need to create your own External Testing group (which I have called Beta Testers in this case). Apple will let you add up to 10,000 external testers for your application.
You application is now on App Store Connect, and has been made available for testing. You can follow the same steps to upload a new build of your application when you make any changes. Remember to make sure you let testers know how to provide feedback (testers can provide screenshots and written feedback) to make the most of the available tools.