XCode Cloud - Custom Build Scripts and CocoaPods
· 30min · software
Recently I was trying to update our deployment pipeline to use XCode Cloud to set the groundwork for CI/CD in the future. Being an iOS application, I was interested in using XCode Cloud, which I had not yet had the chance to try. Released in 2022, XCode Cloud is a natural tool to use when developing CI/CD systems for the Apple ecosystem as it ties in XCode, TestFlight, and AppStore connect.
My goal was to setup an automated pipeline to archive and distribute the application to our internal testers on App Store connect. The general outline is explained well in Apple’s documentation .
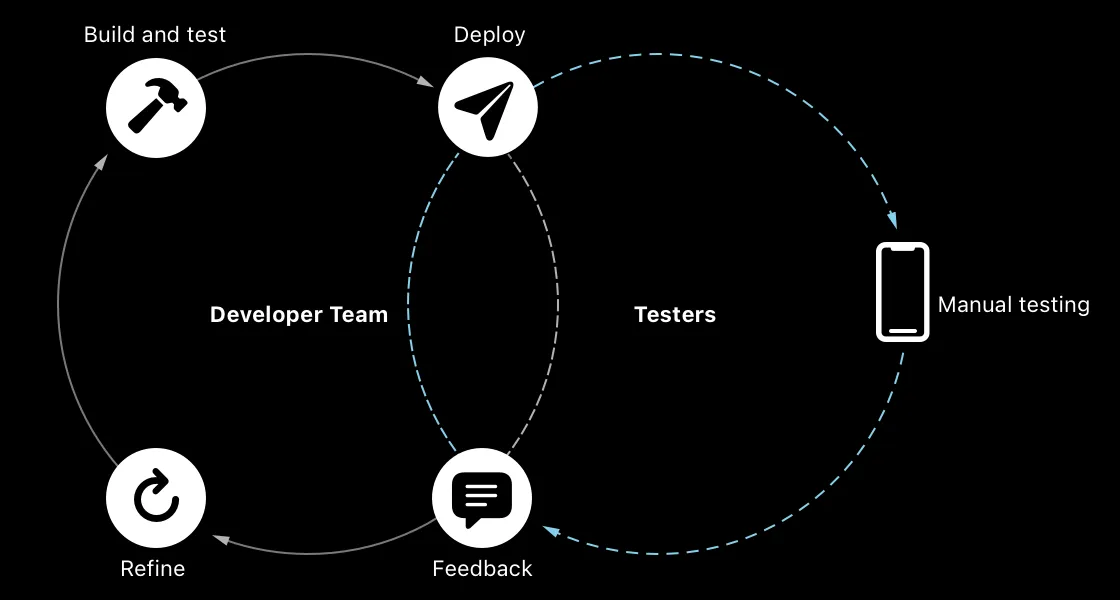
The application already builds manually on XCode, and the project source code was hosted on Bitbucket Cloud, which is a supported source code management (SCM) platform. The application furthermore met the XCode Cloud requirements, so I initially did not believe there would be an issue in setting this up.
Initial Attempt
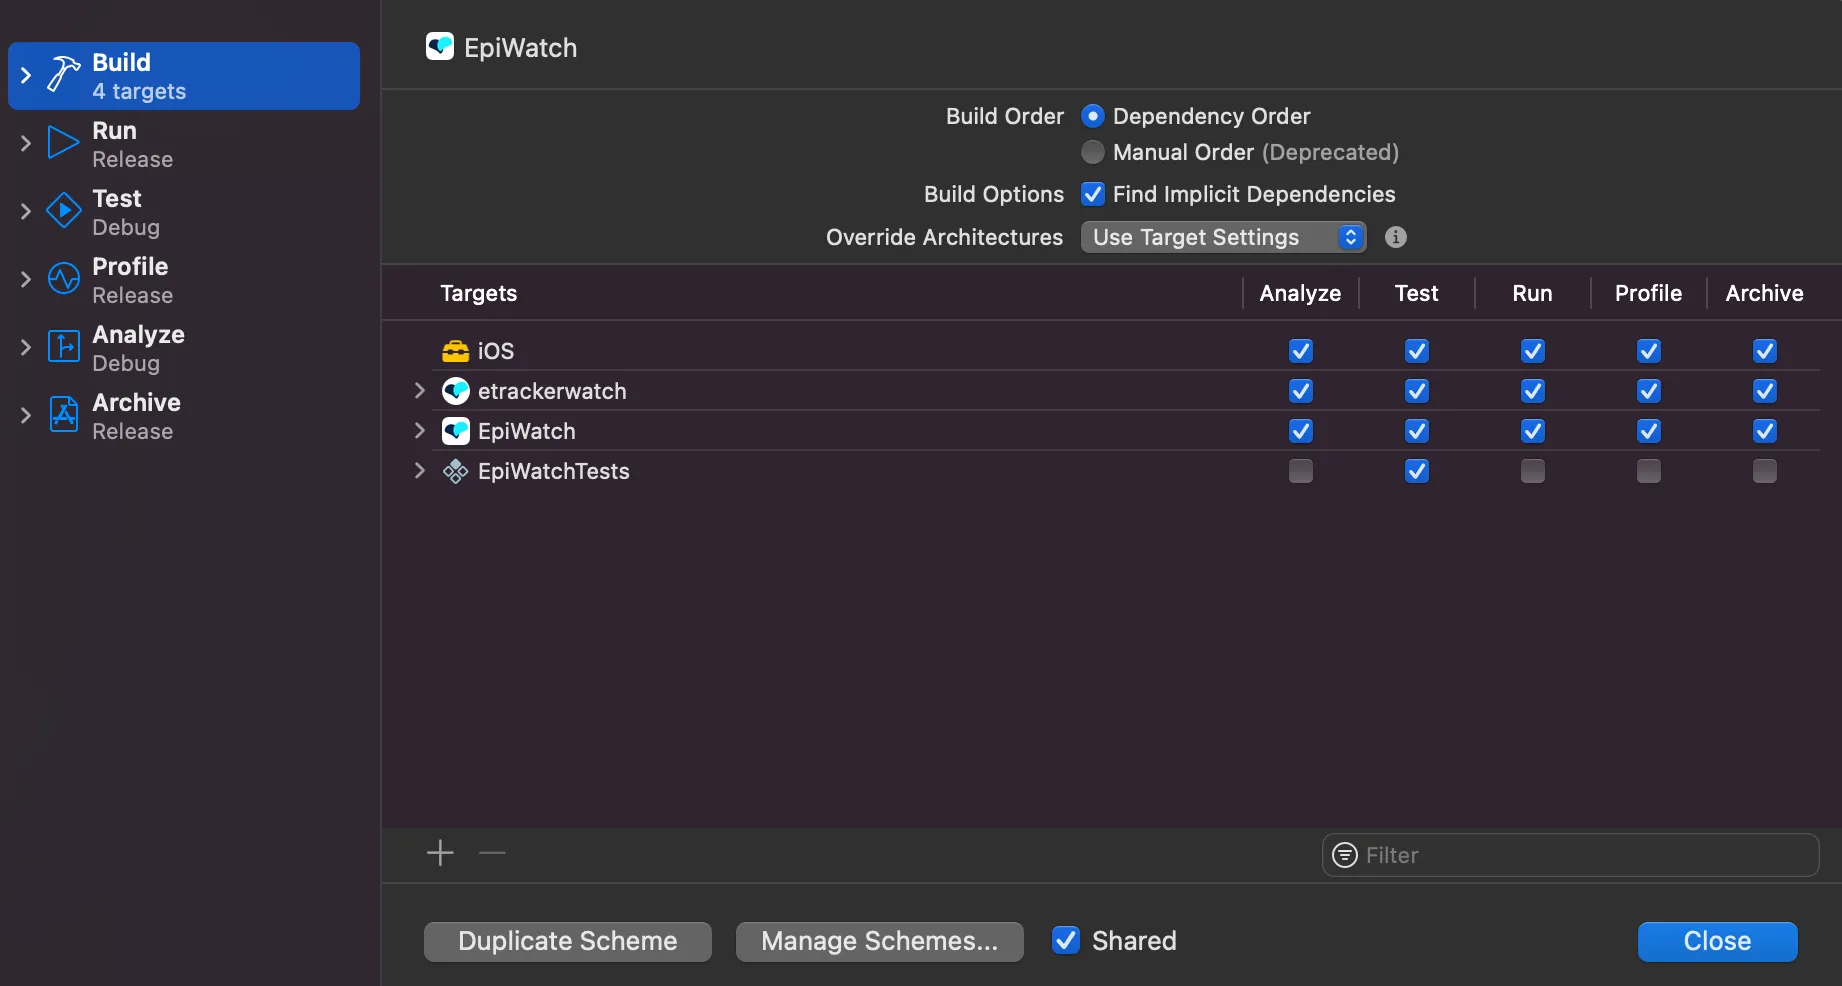
1. Enable Archive Action
First, I ensured the relevant targets have the Archive action enabled under the build tab. This will cause the target to be included during an archive action, which is necessary when distributing the application through App Store Connect.
2. Creating a workflow
Next, I went to the Report Navigator, and selected Create Workflow under the Cloud tab. XCode will prompt you to select a product. XCode finds these products by analyzing your project/workspace and lists each each product if finds in the Select a Product sheet. Note here, that if your project contains targets that use the same bundle identifier, XCode Cloud considers them to be one product. This leads to two best practices:
- When possible, you want to share the same bundle ID across versions of your app for each platform.
- If you are using multiple bundle IDs for each platform, then make sure to configure additional workflows for each product, as XCode will identify each bundle ID as a separate product.
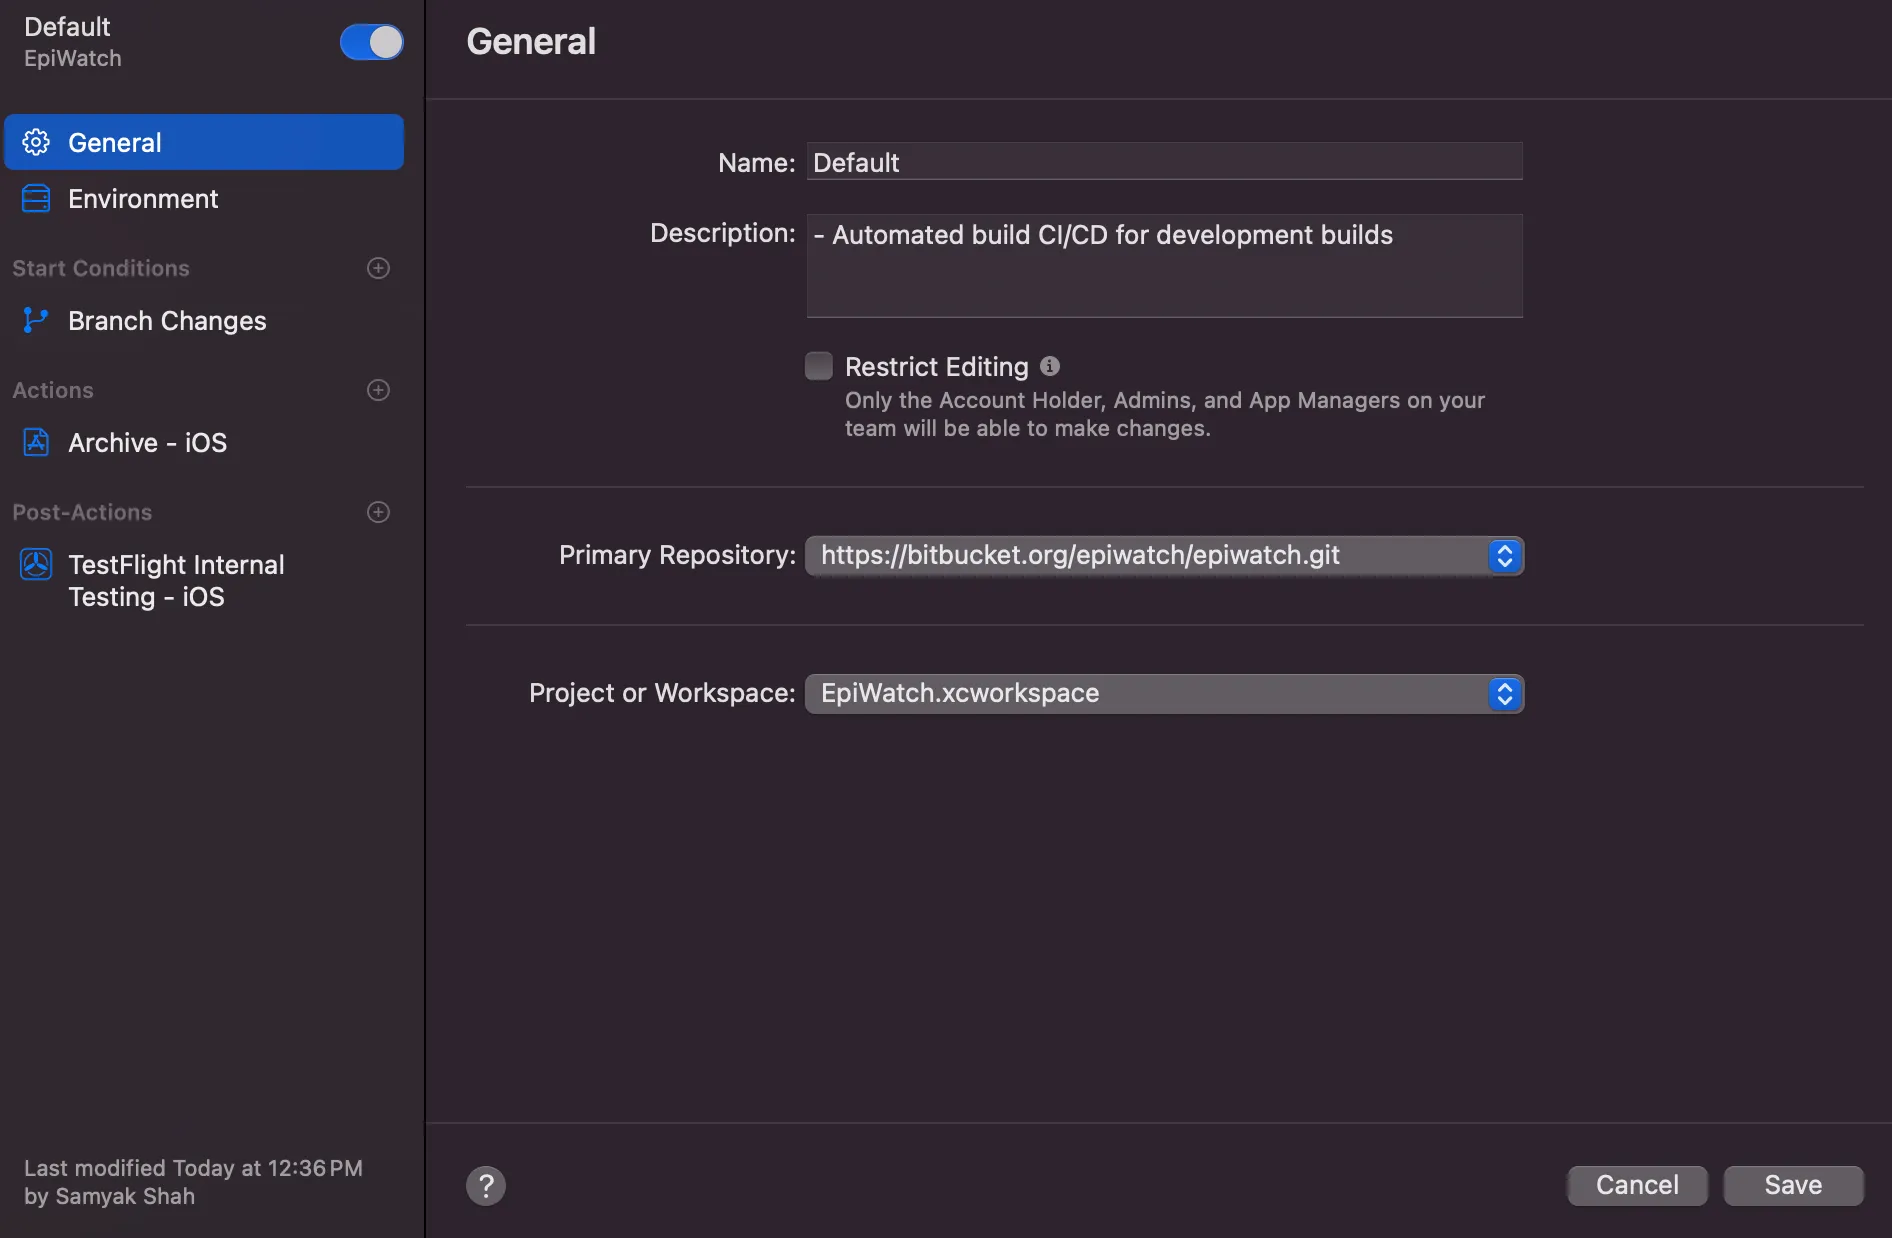
As I was part of multiple Apple Development teams, XCode also asked me to select a team that I intended to use for distribution. Following this, XCode will provide a custom workflow that does the following
- Watches your git repository’s default branch to start a build when there is a change to the branch or when there is a pull request that targets the branch.
- Uses the latest released MacOS and XCode versions for its temporary build environment
- Uses the archive action for the product targets
- Sends an email with information about build, including links to the build report in XCode and App Store Connect
I made some slight changes to this pipeline to meet the requirements of my application. I wanted to change the watched branch, change the environments used for the build, edit which targets are getting archived, and add a post-completion action to distribute the archived and uploaded application to the development team.
In the official documentation, Apple suggests not configuring the first workflow to keep it simple, but if you are somewhat comfortable with what is occurring, I do not believe this is necessary.
3. Granting access to Source Code
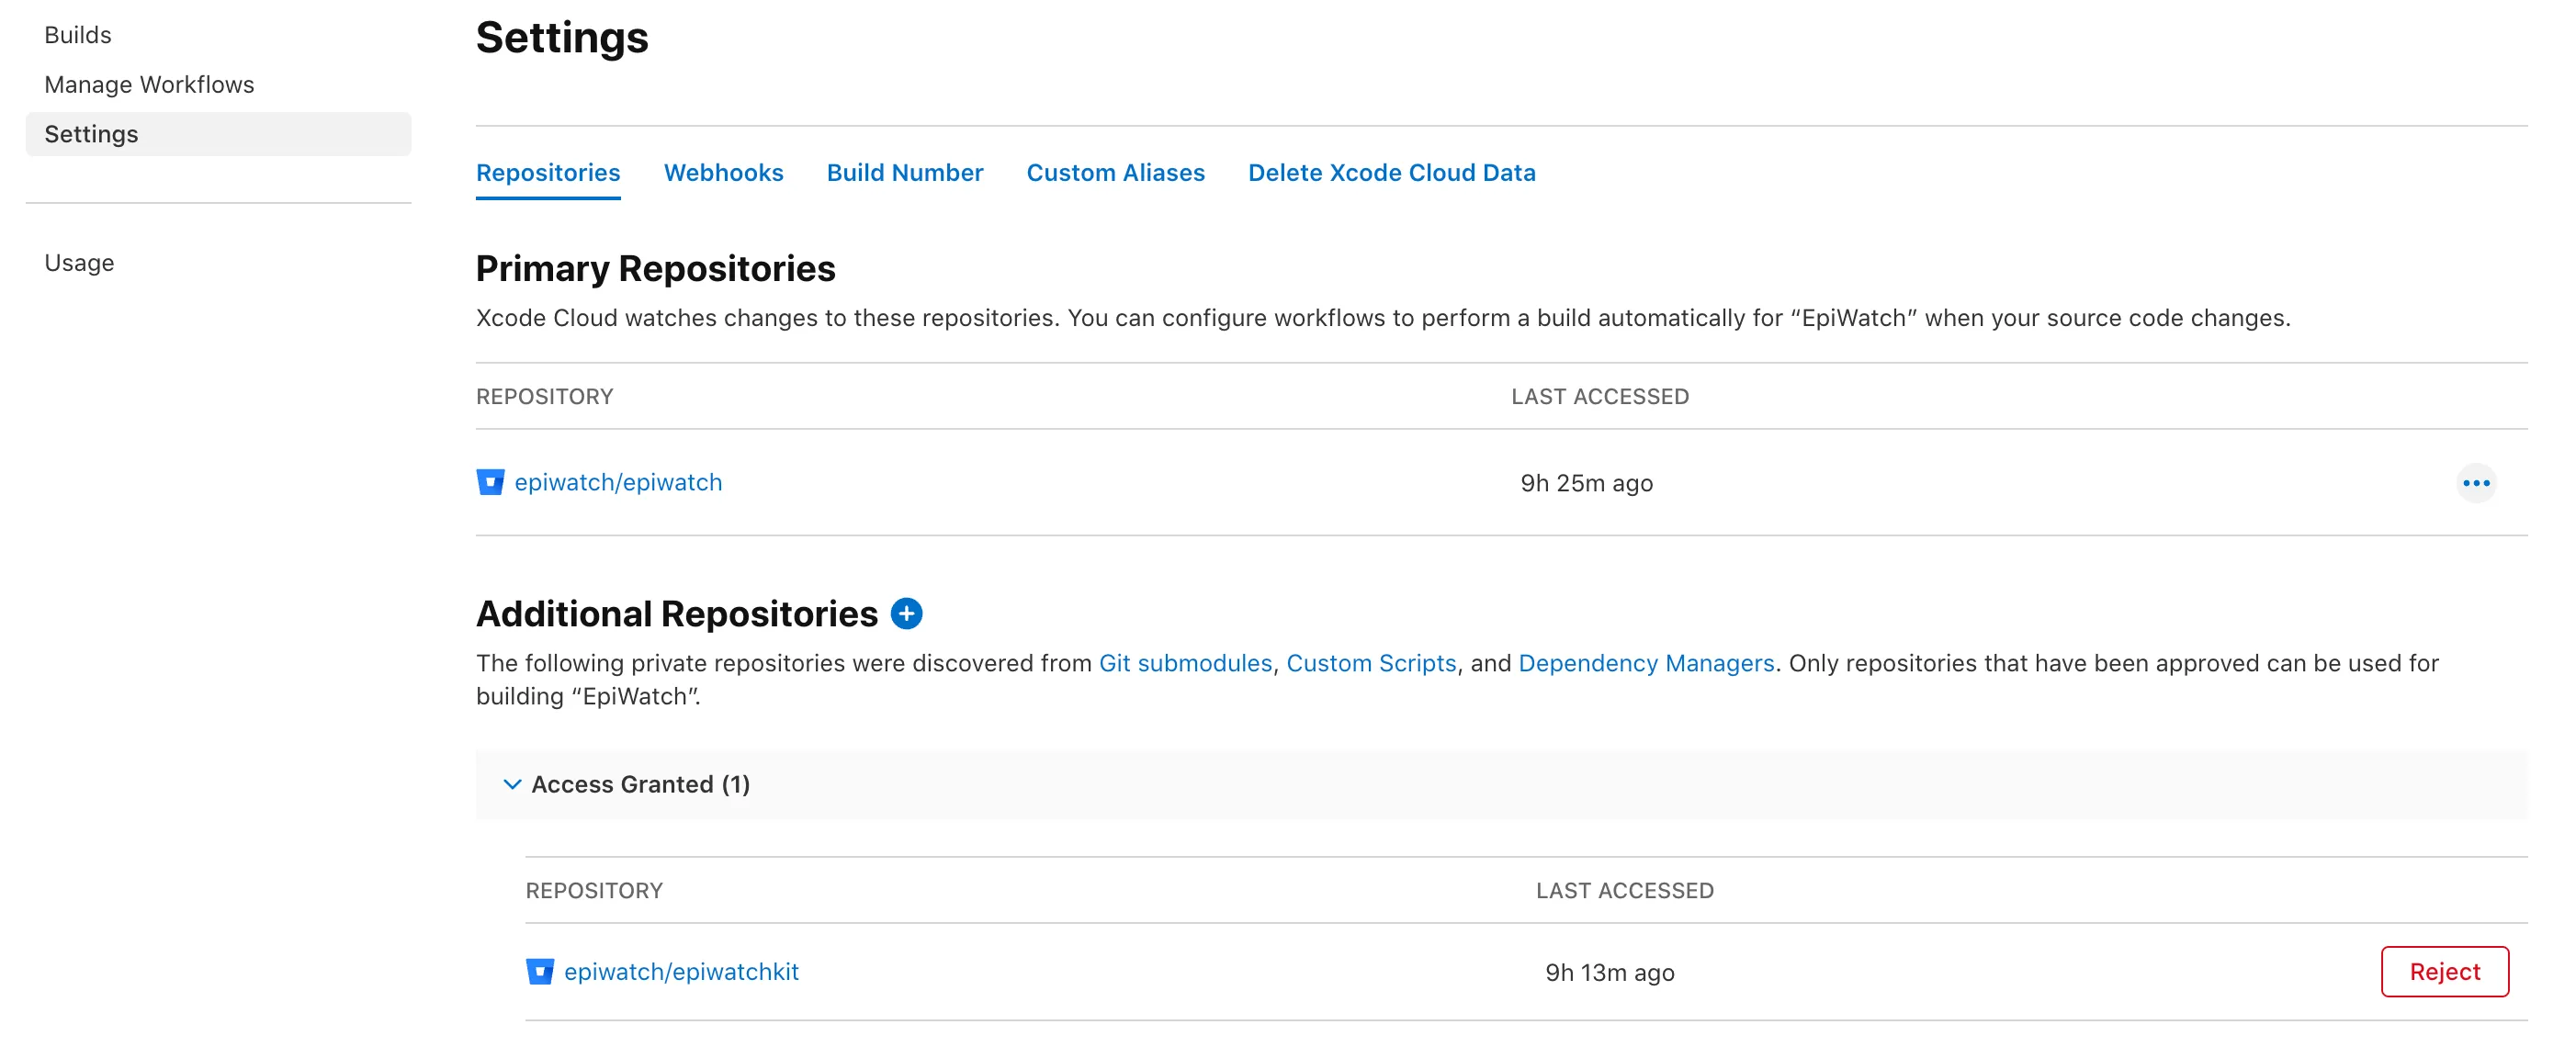
Upon continuing from the previous step, XCode automatically requesed access to my Git repository that conatined the code. This access is vital as it uses the git access to build and test the application. I allowed the application access to my source control repository (BitBucket). I furthermore went to App Store Connect, and went to the Settings under the XCode Cloud tab to ensure that all of the repositories I wanted were accepted. As I wanted a second repository added I made sure to enable that in App Store Connect.
Initial Issues
With the XCode Cloud configuration set up, I initiated the build using the recently setup workflow. However I was almost immediately met with a host of errors and build failures.
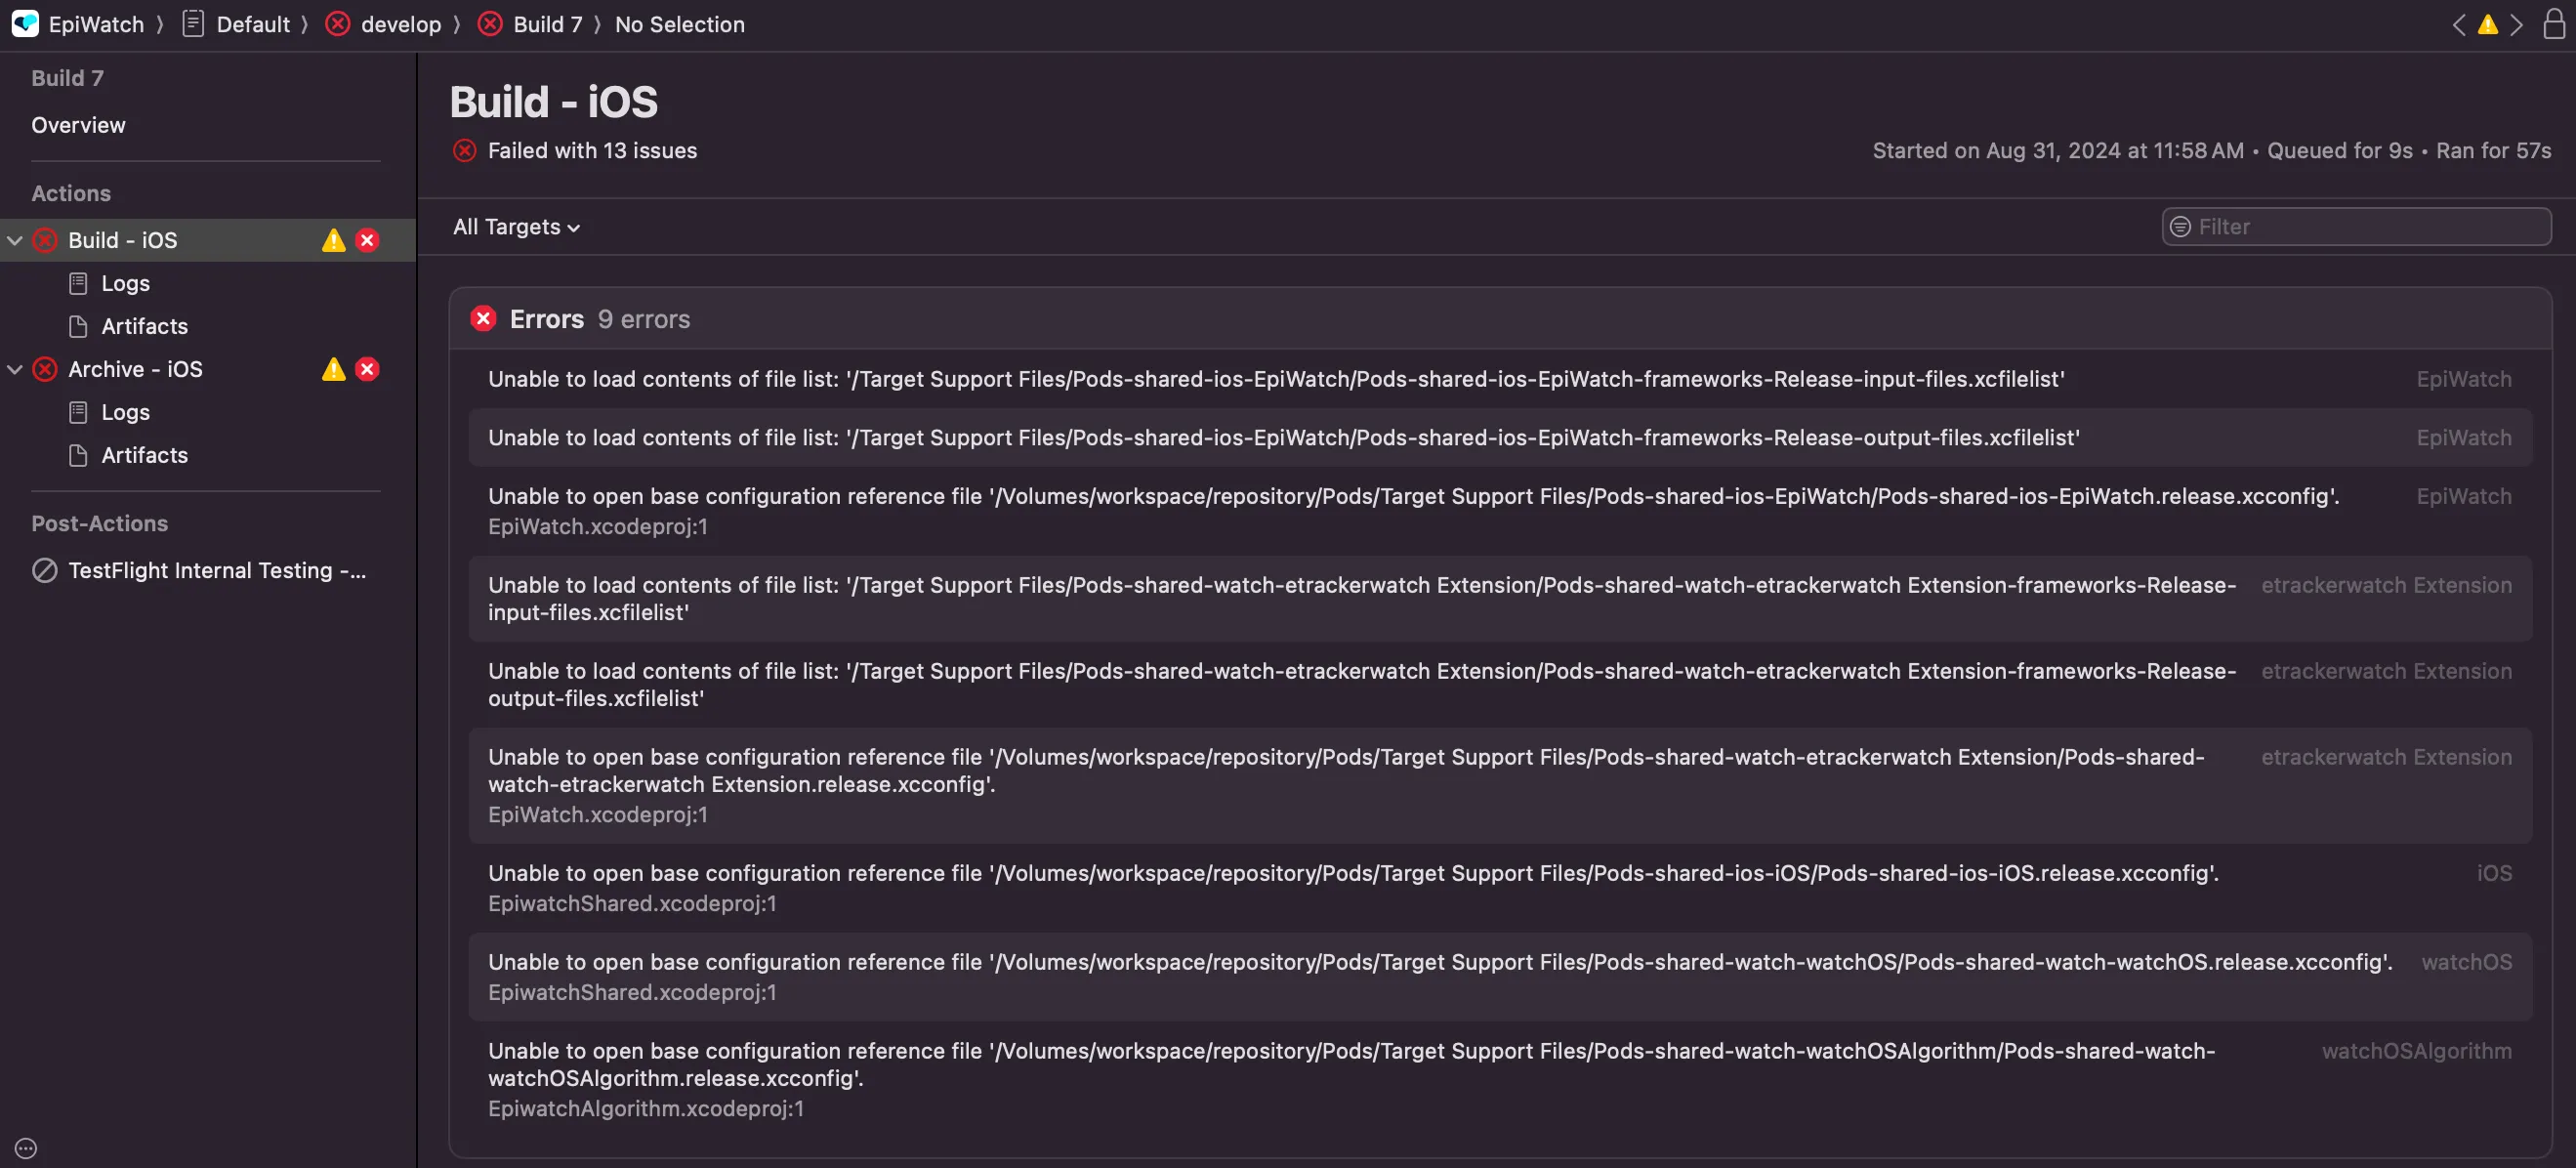
These failures indicated there were some files that were either not present, or had lacking permissions. All of the files were related to CocoaPods, so the evidence suggested that CocoaPods were not getting installed properly.
Reviewing the Documentation
CocoaPods is a popular open source dependency manager for Apple platforms, so I was sure there was some environment setup issue where CocoaPods were not getting installed appropriately. Searching the internet, I found the following documentation that seemed to provide an answer.
Writing Custom Build Scripts
If you need to add additional flexibility into your XCode workflow, you can create custom build scripts to perform specific tasks. There are three different script types that XCode recognizes:
- A post-clone script named
ci_post_clone.shthat runs after XCode Cloud clones your Git repository - A pre-
xcodebuildscript calledci_pre_xcodebuild.shthat runs before XCode Cloud runsxcodebuild - A post-
xcodebuildscript calledci_post_xcodebuildthat XCode Cloud runs after runningxcodebuild
This functionality is opinionated, so for XCode to recognize the custom build scripts, they need to be placed in a ci_scripts directory at the root level (same level as where your project or workspace) file is located. They also need to be named exactly as specified above. XCode Cloud will run these scripts at specific moments during the build and deploy process.

- XCode Cloud will respect the
shebangin the file if the file is executable. If there is noshebangin the first line of the script, or the file is not executable, XCode Cloud will run the script aszsh $filename. - You cannot obtain administrator privileges by using
sudoin your custom build scripts. - Files you create with a custom build script aren’t available to other custom build scripts, and XCode Cloud deletes any files a custom files a build script creates. As a result, if there are any resources that your custom scripts access, make sure to place them inside the
ci_scriptsdirectory. If you can’t (or it isn’t practical) to locate them there, then place a symbolic link in this directory.
There is more configuration you can do custom build scripts, and Apple provides excellent documentation on the process here.
Making CocoaPods available to XCode Cloud
The main issue seem to be that the CocoaPods aren’t being initialized and installed in the project correctly when XCode Cloud attempts the build. I knew we could probably add a pod install script as a post-clone script in the build process which should fix the issue, and I soon found Apple documentation outlining the process here.
Since the temporary build environment that XCode Cloud uses to perform a build doesn’t come with CocoaPods pre-installed, if your project uses CocoaPods, you need to first ensure that both the Podfile and the Podfile.lock are committed to source control. Then you decide between two options
- Add the Pods directly to the git repository (potentially through Git LFS)
- Exclude the Pods directory from source control by adding it to
.gitignore, then install them yourself using the custom build script.
Fixing the Issue
To save space in the Git repository, I decided to take the latter option, and add a custom script to install CocoaPods and the pods used in this project. I took the following steps to do so.
- Created a folder named
ci_scriptsat the root of the git repository (same level as the workspace file) - Created a script inside that folder called
ci_post_clone.shwith the following code#!/bin/sh # Install CocoaPods using Homebrew. brew install cocoapods # Install dependencies you manage with CocoaPods. pod install
This script has a #!/bin/sh shebang, and will first install the CocoaPods dependency manager using Homebrew, then install all of the pods in the project using pod install. This mirrors the process that I perform when installing pods manually.
With the script installed, I committed and pushed it to source control to initiate the archive and upload process once again. The build and archive process took approximately 20 minutes this time, and completed successfully.
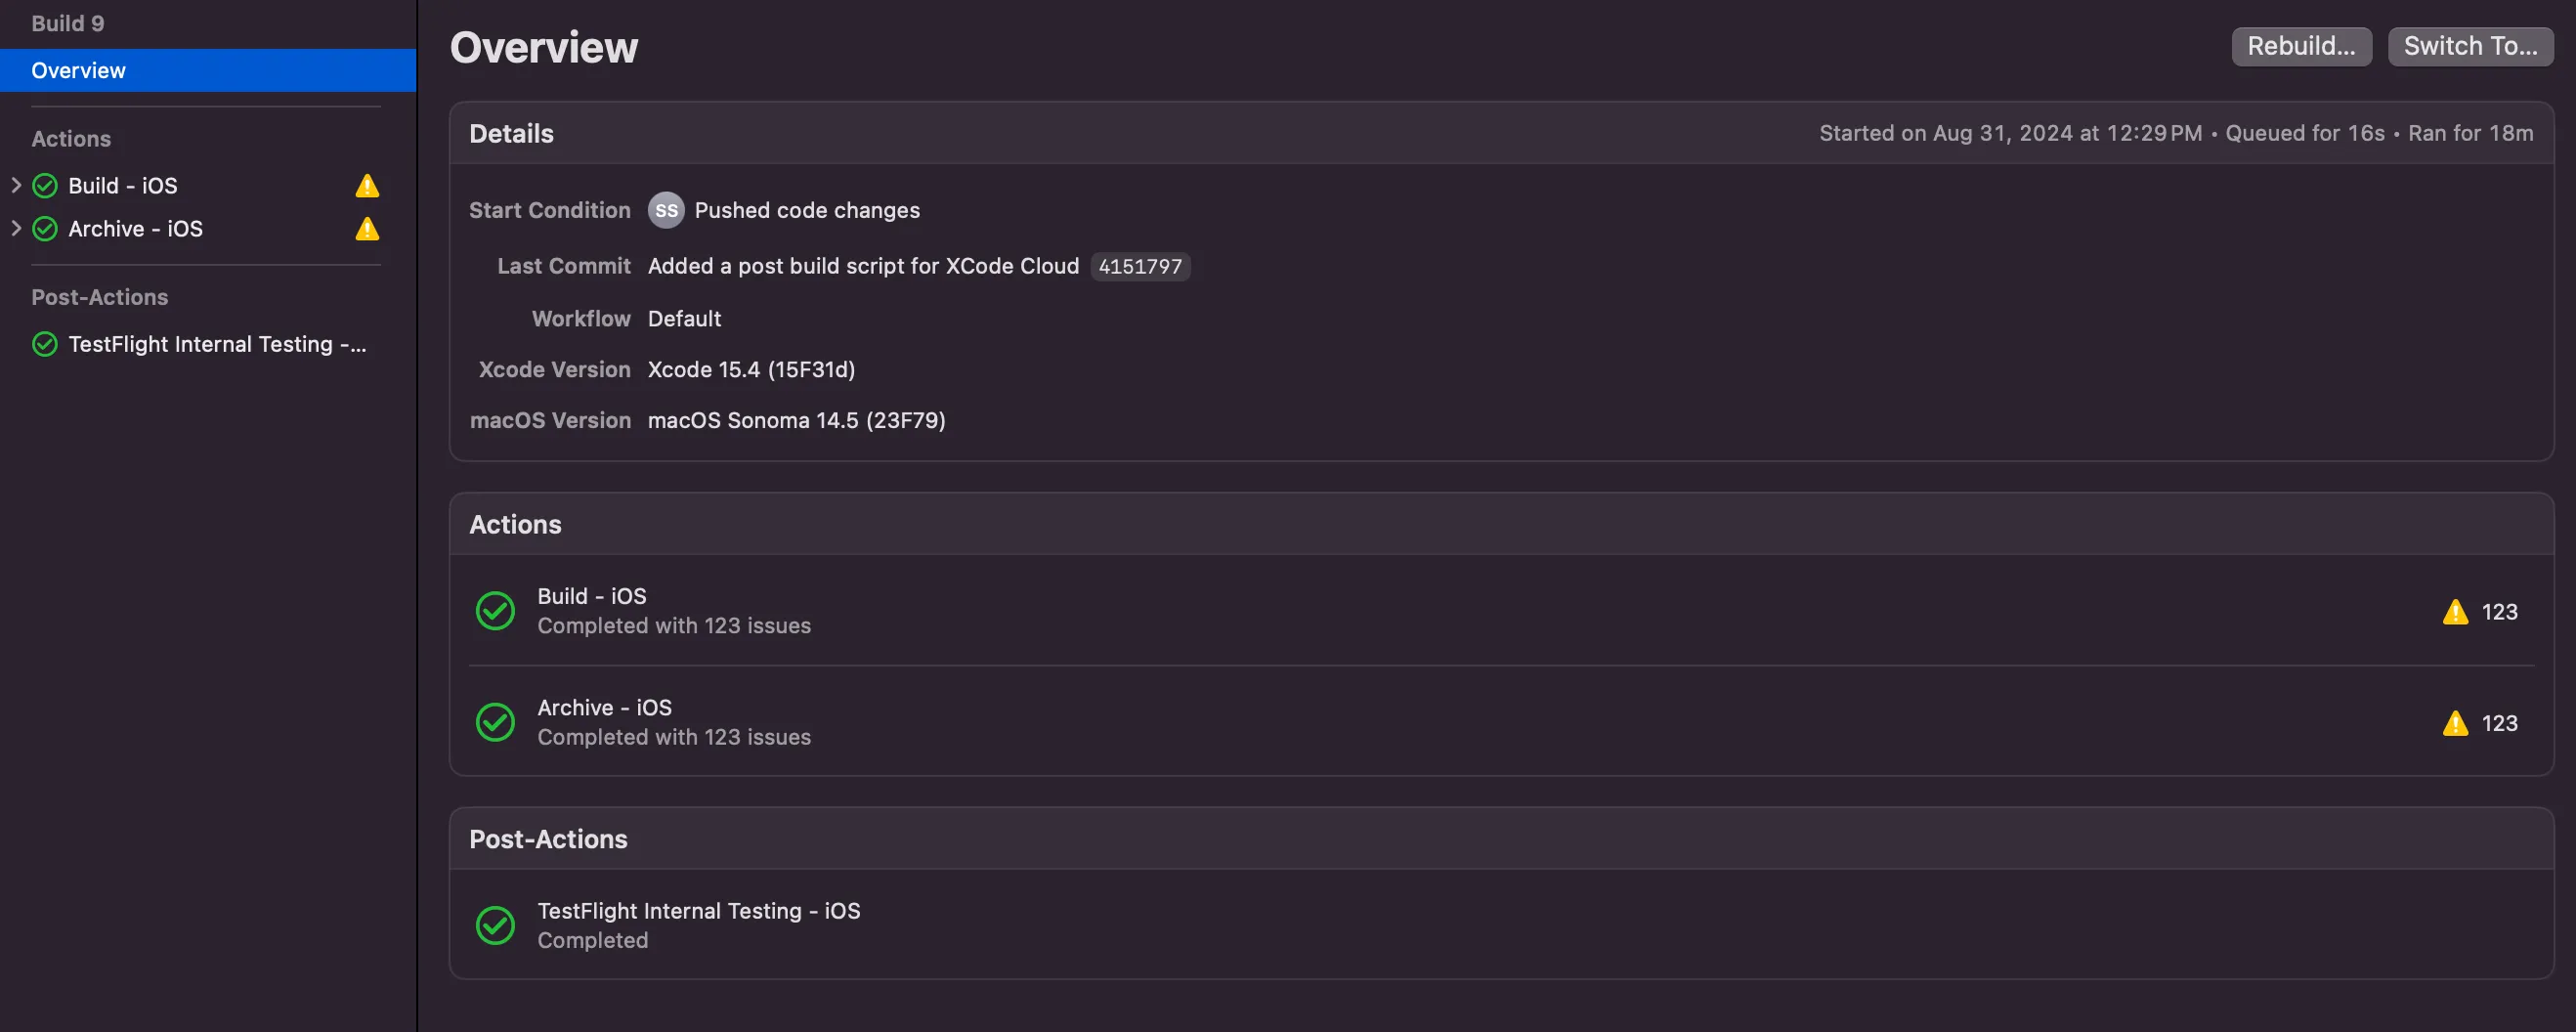
This process will likely be what we continue to use in the near future, until we get rid of our dependency on CocoaPods entirely, and switch to SPM as advocated by Apple.
Articles Referenced: